Instead of replacing my fan clutch, I decided to go another route and install an electric fan and delete the clutch altogether.
Tool List
Normal Tools:
- Ratchet and metric socket sizes, 8-20 mm
- Screw drivers
- Wire cutters
- Wire strippers
- Crimpers
- Continuity tester(test light)
Special tools:
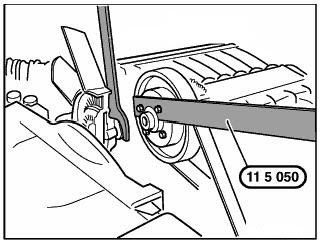
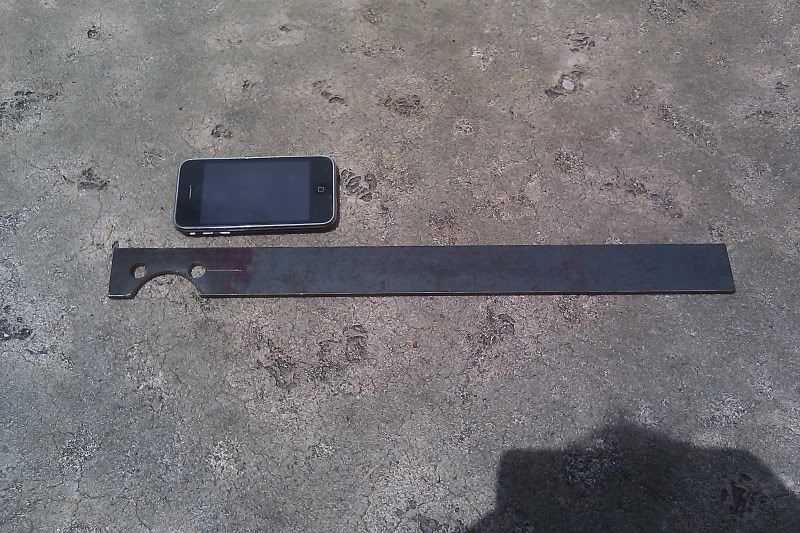
- (Optional see Step 4-2) BMW Fan Clutch Removal Tool (See Picture for P/N) I made this tool myself out of a drill, grinder, and piece of steel. (See my tool)
- 32 MM Open End Wrench
Parts:
- 1- PRM-19117 - Electric Fan, Single, 18 in. Diameter, Reversible, 2,550 cfm, Aluminum Blade, Kit
- 1- PRM-5591PT - Relay and Harness, 40 Am, Single Pole, Kit
- 2- 1/4 Inch Hose Clamps
- Butt splices, electrical tape, and zip ties for the wiring.
Step 1
- Remove the air box covers
- This is fairly simple, pop all the metal clips off with a flathead screw driver and the covers pull right out.
- Disconnect the MAFs and intake tube.
- Unplug the large plug in rear of MAF
- Un-clip the cord that comes from plug from various places on intake tubing.
- Remove hose clamps that hold elbow tubes to the plenum. Make sure to cover the open holes to prevent unwanted particles from entering your engine.
- Remove Expansion Tank from shroud
- Remove the two push pins that hold the corners of the tank onto the shroud. (First pry out the middle piece, then remove the outer ring.)
- There are two hoses that come out of the shroud and attach to the tank. I broke the clamps that held them on and bought stainless steel 1/4 inch hose clamps from Lowe's. The hard tube stays on the shroud, the rubber tube stays with the radiator.
- Lift the tank out, and unclip the sensor from the bottom. You can leave the large hose attached and move the tank out of the way enough to work.
- Removing shroud and fan
- Read this first: The fan sits inside the shroud, so they can't be removed separately as the engine blocks you on one side, and the radiator on the other. What I did was remove the fan clutch first, and sat it in the shroud. Then I removed the mounts from the shroud and pulled the shroud, fan, and fan clutch out together. You can do it in whatever order you think is best; just be careful not to touch the fins on the radiator very much as they bend easily. (Another alternative: The fan is held on to the clutch by allen bolts. You can remove these and work on the fan clutch once the shroud and fan is out)
- Removing the fan clutch - This is difficult as the clutch is mounted on the water pump pulley, which spins with the serpentine belt. The threads on the clutch are reversed, so you need to spin it to the right(when facing the car from the front) to remove. The nut is a 32 mm and you will need an open end wrench to hold it. Sometimes it is removable by impacting the wrench, but not always. BMW specially makes a tool, that holds the bolts on the water pump pulley so you can remove the clutch easier.
- Removing the shroud - Remove the two push pins from the left and right sides of the shroud. (First pry out the middle piece, then remove the outer ring.) If you are looking straight down at the shroud from the front of the car, there is a small box connected to the shroud in the bottom passenger side. Remove this and set aside. You can now pull the shroud out.
Step 5 (Installation of fan starts here)
- Mounting the Fan
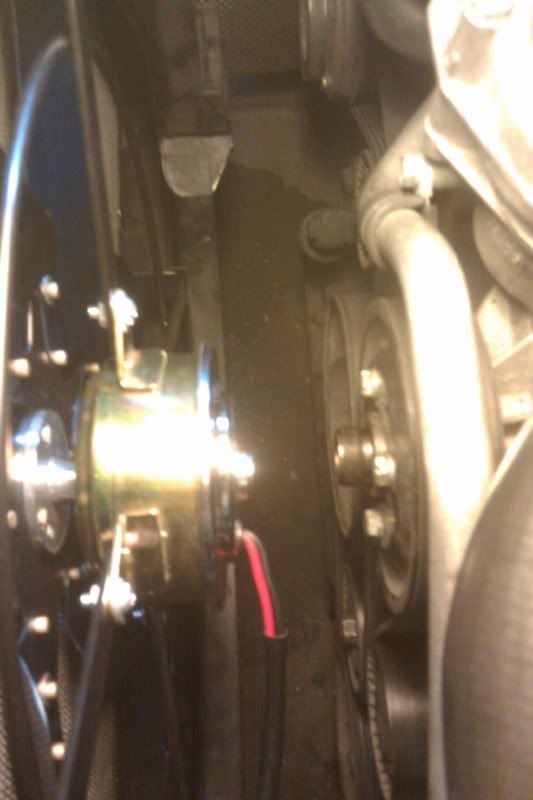
- I lined the center on the fan up with the water pump pulley to match the placement as OEM as possible. (Picture)
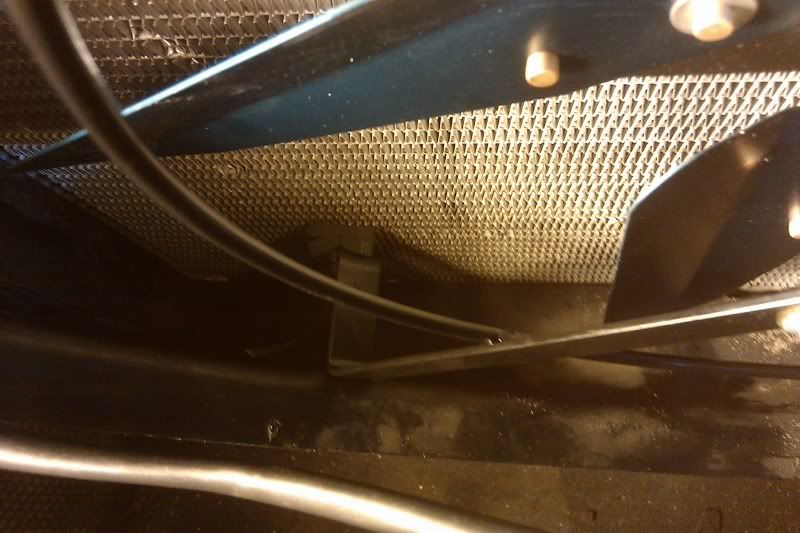
- I then used the mounting hardware that came with the fan, and mounted it to the radiator. I used spacers to protect the radiator and push the fan deeper into the shroud(closer to the engine) to make it as effective as possible. (Picture) Be careful not to space it out too far, or the brackets on the bottom of the fan will hit the shroud. (Picture) You will have to remove the radiator brackets to make room for your hands to put the bottom mounts through the radiator. Remove these two bolts to do so. (Picture)
- Once you have all four mounts in place, replace the fan and the shroud, make sure everything fits, clamp down the fan and trim the mounts.
- Wiring the fan
- This is where you can start to get creative. I made a video showing where I attached all the wires by particular color on my relay here:
- I chose to wire it through my angel eyes for a couple of reasons. One, I use these as my daily running lights(just turn them on by habit every time I turn the car on) so my fan is always running when my car is running. Two, I have the cheap white angel eye upgrades from eBay for 40 dollars. I spliced into the adapter that they gave me so I would not have to cut into any stock wiring. I also did not have to make an aftermarket switch since it is controlled through my lights. Third, I do a lot of track/drift events in my car, and I want to be able to use my fan when the car is not on. I simply switch my angel eyes on and leave the car, the fan stays on. Lastly, the driver side angel eye is right next to fan, so I did not have to do any extreme wiring. The only disadvantage to this is if I drive on a cold night, I am forced to use my fan as my lights are on. Since the car has a thermostat that stays closed until operating temperature I do not see this as a huge deal though.
- If you want to wire it on your own, use a continuity tester to find when 12v is giving power to certain wires. If you are not sure how to use a continuity tester, Google it. Here are the wiring schematics:
87a(normally closed) - Fan power
85 - Ground from fan, ground to chassis
86 - 12 volt switched
30 - 12 volt constant
They sell thermostats that go through the radiator that measure temperature as well. They come with relays and come on at 180 and off at 170. You can find them pretty much everywhere.
Good thread on M5board.com about places to tap switched 12v power from.
http://www.m5board.com/vbulletin/e39-m5-e52-z8-discussion/157505-power-need-advise-where-tap-electric.html
Here is a video of it working.
No comments:
Post a Comment